Plate Carrier Setup (Complete Guide)
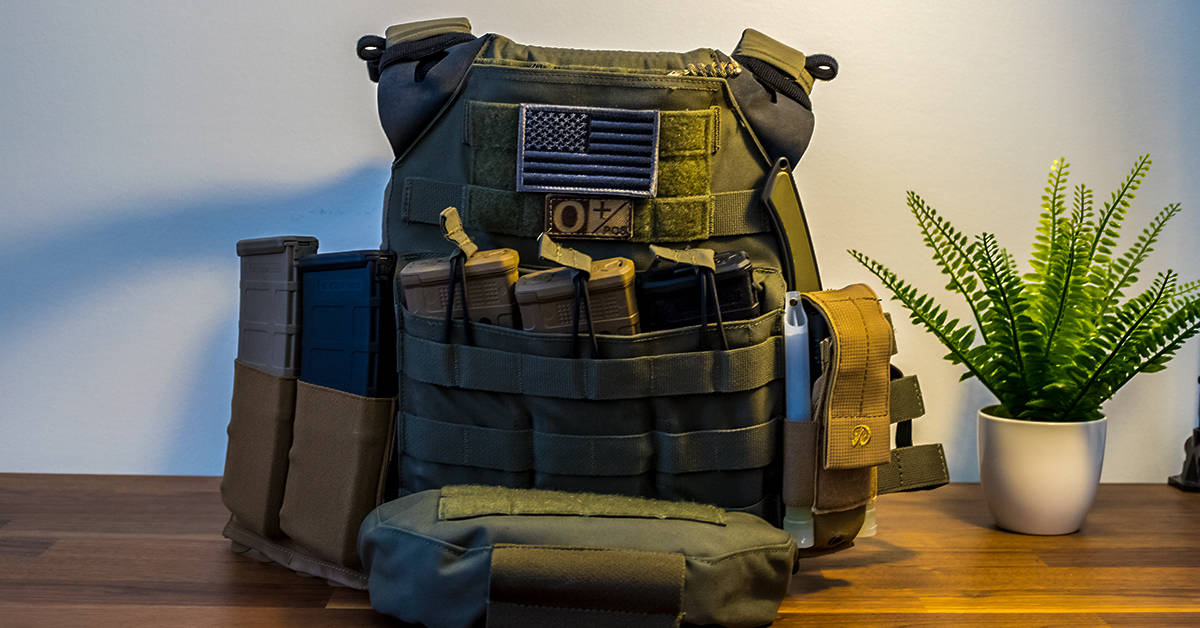
This is my plate carrier setup and what I recommend for people to follow. There is no one size fits all for this topic and a lot of this will depend on personal preference, but use mine as a basic guide.
There are some main things that a good plate carrier setup should have though and fundamental reasons why it should be setup a certain way.
This article will cover every topic and be a complete guide for beginners and people who are looking for new insight.
Why do I need a plate carrier?
In the firearms community, owning body armor is finally becoming the norm (which is a good thing). People are starting to realize the importance of stopping bullets and also having a way to carrier vital gear to help win a firefight.
A plate carrier is a perfect way to protect yourself from being shot, to carry your ammo, and to carry your IFAK (individual first aid kit) and medical gear.
Also with the recent surge in people purchasing body armor and plates, there have been politicians trying to ban them for civilian use.
Best Plates For Carrier Setup?
The lightest plates with the highest rated level protection will be the best, but it also comes down to price and budget.
A good rule of thumb is to have a plate rated by the NIJ (National Institute of Justice) that protects against the round that you carry.
For me, this would be M855 and XM193, and that is what I would recommend for most people as well.
There are 2 main types of plates. Ceramic & Steel.
Steel Plates
Steel plates have become very popular lately from companies like AR500 armor. But there are a few downsides to steel.
One of them is the weight. Steel plates are going to be very heavy compared to traditional ceramic plates and another downside to steel plates is you have to worry about Spalling.
When a steel plate gets hit by an incoming round there’s going to be shrapnel and spalling (small fragments of the round and material from the plate that get ejected).
Yes, it will prevent the round from hitting a vital organ like your heart or lungs, but you could get spalling and shrapnel goes up into your neck and your throat also down into your groin or your thighs.
Which is not ideal for surviving.
A lot of these companies will offer a build-up coating on their plates which is pretty much the same as a spray-on truck bed liner. These are supposed to prevent spalling from happening.
This then increases price and weight and at this point, it makes more sense to go with ceramic plates.
If money is tight then I recommend the AR500 Level III+ Plates with the extra build-up coating. But again try and get ceramic plates instead.
Ceramic Plates
Ceramic plates are superior to steel plates in my opinion. They are lighter than steel and you do not have to worry about spalling.
They tend to be more expensive and usually have a longer lead time when ordering them.
They will stop rounds that they are rated for and when it comes to body armor and plate carriers weight is a very big factor in deciding.
In a firefight, speed and mobility are what I want.
The ceramic plates that I went with for my plate carrier setup were Spartan Armor Level III+
What size plates & carrier should I get?
You should always size your plate carrier off of the size of your plates. Most people will probably be fine with a medium-size plate.
When ordering them make sure you check the manufacturer’s sizing chart.
Then once you know what size plates you need to order a carrier that is that same size.
As an example for me, I ordered medium-sized plates and ordered a medium size plate carrier.
How to properly wear and adjust a plate carrier?
This is something a see people get wrong all the time.
A plate carrier needs to protect your heart and lungs, NOT your stomach.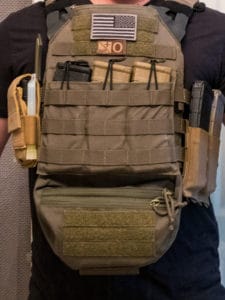
Most people often wear plate carriers too low and they should ride relatively high on your chest and back.
The top of your carrier should be right where your collar bone meets in the center of your chest and for most people, the bottom of the plate should be slightly above your belly button.
The different types of plate carriers I recommend
There are 2 different carriers I like and they are both considered low profile.
The current trend in carrier design has been getting more minimalistic with mobility and speed the biggest factor that goes into the newest designs.
Crye JPC
Overall this is a very good plate carrier there are lots of positives about this carrier and only one negative.
The plate carrier I have is the Crye Precision JPC. I went with the Gen 1
They do have a newer Gen 2 available which is a little bit more expensive and has some nicer features and in hindsight, I probably should’ve gone with the Gen 2.
Mainly because the Gen 2 has a quick change placard system. I could still do that to my JPC I just have to buy an extra part in order to get the quick change placards.
Also, the Gen 2 comes with a zipper system on the back panel that makes swapping out different back panels quick and easy. I like to keep the back of my plate carrier naked with nothing on it, and I will explain why later.
One thing I dislike about the JPC is the shoulder straps. They are very thin which is good for getting the rifle stock tight in your shoulder, but the shape of the straps is uncomfortable on me.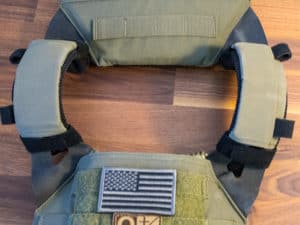
The two shoulder straps flair out to the sides and I find this to be slightly annoying when wearing. I think they should be more vertical like the LV119.
I added the PIG Shoulder Pads to my JPC and this does help with the discomfort and recommend adding these if anyone else finds the shoulder straps uncomfortable.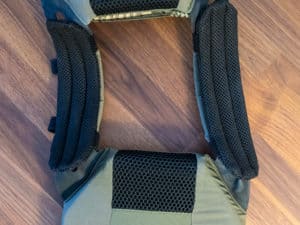
Spiritus Systems LV-119
The Spiritus Systems LV-119 is another plate carrier that I recommend. It is very modular and very high quality.
The plate bags and cummerbund need to be purchase separately and you will have to assemble this plate carrier yourself.
It has a front panel placard system and you can easily change them depending on your needs. One feature of this plate carrier that I like better than the JPC is the shoulder straps.
They are horizontal and more comfortable on the shoulders in my opinion.
This plate carrier also has two zippers on the back panel and they have a few different designs that you can attach.
The LV-119 has the skeletal cummerbund like the JPC but they offer a stretch cummerbund as well so you have a few more options with the Spiritus Systems LV-119.
There are plenty of good quality plate carrier that you can buy, but these two are what I personally recommend.
What Color Should My Plate Carrier Setup Be?
This depends on what area you live in and your environments. I originally wanted Multicam but changed my mind at the last minute and went with ranger green.
Unless you live in a desert environment with a lot of brown, I would recommend ranger green for everything.
It looks good and professional and blends in well in most areas.
Related Articles
- AR-15 Rifle Setup (Complete Guide)
- Best Sig MPX Upgrades & Accessories (Complete List)
- Remington 870 Tactical – Upgrades
How to start your plate carrier setup?
Now that I went over all of the prerequisites for choosing armor and plate carriers let’s get into how to set up a plate carrier.
A plate carrier needs to hold your additional ammunition for your primary weapon and medical gear.
These are the 2 main things it should do besides holding in your plates.
Extra Ammo
The front of your plate carrier should be slick and only hold 3 additional 30rd magazines.
In order for you to get low in the prone position and to be able to get as small as possible, you do not want to have a lot of bulk upfront.
Your overall goal should be to try and keep the entire profile of your silhouette small.
A triple AR mag pouch should be centered on the front of your plate carrier.
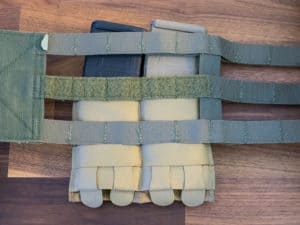
I like keeping an additional double mag pouch on the side under my arm to hold 2 more magazines. I use the Blue Force Gear Ten-Speed Double Mag Pouch for this. It is simple and works great. I like how the pouch collapses down when it is empty too.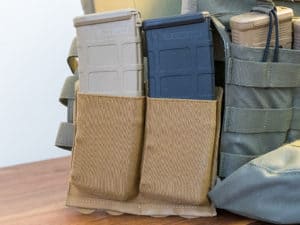
This gives me a total of 5 magazines plus the one on my battle belt (this is my primary/speed reload) and the one in my rifle giving me a total of 7 magazines on me or 210 rounds.
As far as magazine orientation and which way the rounds are facing is really personal preference and you should try both to see what works for you.
I use the triple mag kangaroo pouch that comes integrated on the JPC. It has the bungee straps that hold the mags in place. This isn’t the quickest to draw a magazine but I use the one on my belt as my first reload.
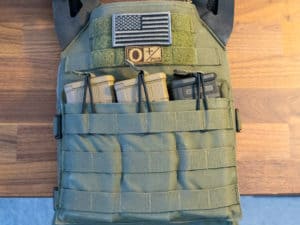
I do add anything else to the front, just the 3 magazines in my plate carrier setup. If I ever needed to add any more gear of ammo I do have the option and have 3 more G-code scorpion soft shell mag pouches that could be added on easily.
IFAK & Medical Gear
Medical gear is very important and often overlooked. If you get shot you need to stop yourself from bleeding out.
The contents of your medical kit will depend on your training, but the most important piece would be a tourniquet.
Bandages and a few other items like chest seals are important as well. I highly recommend taking a combat live-saving course if you haven’t already.
I use a dangler pouch that is directly below my magazines on the front of my plate carrier.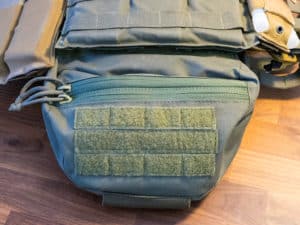
I think this is the best spot to have your medical gear because it can easily be accessed with both hands and does not get in the way of anything else. Also, it can quickly be removed just by lifting up the velcro that holds it in place.
I also have a smaller medical kit on my battle belt as well, but the dangler pouch is my primary IFAK. The small one on my belt is the Coyote Tactical Burrito Pouch.
I personally like the Chase Tactical Joey Pouch. It is good quality and has two separate compartments that open and close with zipper pulls.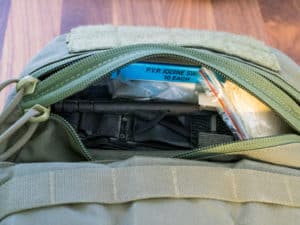
There are also two elastic loops on the bottom that can hold extra gear and three rows of molle webbing on the front that you can add velcro patches to.
The Joey pouch has a soft armor pouch in the rear of it where you can add soft armor if you want which is a nice little feature.
This pouch also had additional room in the main compartments for any other gear you might want to carry. However, I find that people often carry a lot of stuff that they do not need, and keeping things light and simple will work best.
Optional Gear
With all of the main stuff out of the way, you may want to carry some other gear on your plate carrier. There are a few items that might be beneficial but be careful. It’s very easy to get carried away here.
Always try and keep it simple and make sure every item has a purpose.
Knife placement
I carry a small knife on the inside of the cumberbund on my left side. It is very small and takes up almost no space.
I use a Spartan Blades Phrike that is held in a Kydex sheath. Any good knife would work as long as it’s not too large.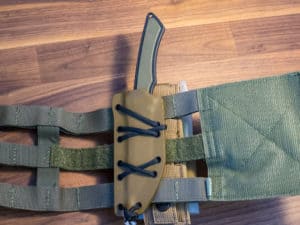
I use some paracord to weave it in the molle webbing of the skeletonized cumberbund on the JPC.
Having a knife on you is necessary I believe in any combat situation. Chances of having to use it are very slim but so is needing any of this gear in all honesty. It’s something that should be added to your plate carrier though.
Flashlight & Chemlights
You probably should have a weapon light on your primary weapon system and also have one on your sidearm. But you may want to consider having a small handheld light or a headlamp that you can use in various situations where you don’t want to present your weapon or point it at something.
I have a Streamlight ProTac HL that I carry in a Leatherman Nylon Pouch on my right side attached to the cumberbund. There are small elastic loops on each side where I have two Chemlights as well.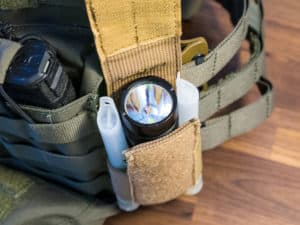
These are very easy to carry and take up very little space. Also, it doesn’t add much to the overall weight of my setup.
Admin Pouch
The Crye JPC has a very small pocket at the very top of the plate carrier on the front panel. I use this to carry a folding knife, a small notebook, a pen, and a sharpie.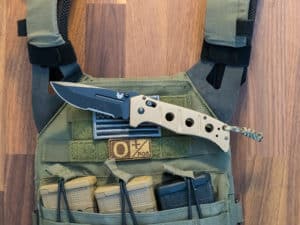
The folding knife I use is the Benchmade Adamas and the notebook is a small Write In The Rain.
This is a very small pocket and I am unable to close this pocket with everything stuffed in there, but everything is so tight that I do not have to worry about any of it falling out.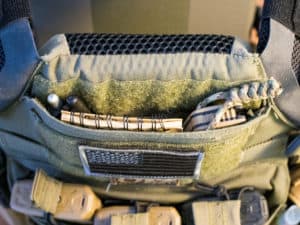
Another thing that I wish the JPC did have is a zipper to open and close this pocket. It has velcro to open and close it, but because of the position of this pocket, a zipper would be way easier to access.
Back panels and hydration
The back of my plate carrier is completely bare with nothing attached to it. Many people believe that when there is empty space they have to put something there and add to it.
That is not the case.
I don’t use a hydration carrier in my plate carrier setup because I don’t think it is necessary is the most likely situations I can think of where I would be using my plate carrier in a real-world event.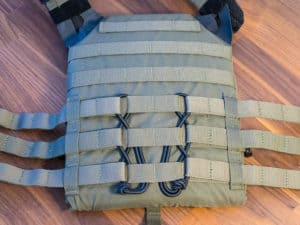
Even if I am training with it on, I will always have a water source nearby.
Also, I like the idea of being about to throw on a backpack if needed. I have hydration in my pack and could also use it to carry more ammo, an MRE, cold weather gear, or a rain jacket.
If you have a bulky hydration carrier on your back wearing a backpack will be uncomfortable and cumbersome. They also weigh a lot when filled.
As for back panels, you cannot access them yourself while wearing the plate carrier and they would make sense if you are operating in a team environment where a buddy could get into it easily.
Radio placement
I do not run a radio on my plate carrier simply because I do not have one. Again if you were in a team environment this would be a critical piece of gear.
I have been doing research and plan on adding one soon and would have it on my strong side attached to the cumber bun, but as close as to the front I could get it. Leave a comment if anyone has a recommended radio and pouch setup they would like to share.
Final Considerations
Everything in your plate carrier setup needs to work and flow together. make sure you practice and wear it often to get a feel for everything and don’t be afraid to change it up and try different things until you get it right.
The cool thing about this topic is everyone will probably have a setup that is slightly different but the plate carrier setup I mentioned should be a good base and starting point for most people.
If you run a battle belt as I do, you must consider the placement of those items in conjunction with your plate carrier, and they must complement each other and work together.
Complete List of Items Mentioned
(check the links for the most up to date prices)
- Spartan Armor Level III+ Plates
- AR500 Steel Plates Level III+
- Crye Precision JPC
- PIG Shoulder Pads
- Spiritus Systems LV-119
- Blue Force Gear Ten-Speed Double Mag Pouch
- Chase Tactical Joey Pouch
- Leatherman Pouch
- Streamlight ProTac HL Flashlight
- Chemlights
- Tourniquet
- Coyote Tactical Burrito Pouch
- Spartan Blades Phrike
- Benchmade Adamas
- Notebook
(Some of these items can be found on Amazon. Click Here to view my Amazon Store)

How about info on the battle belt set up and complimenting it to your vest?
Thanks!
Very insightful! I found this by looking for ideas on where to place my TQ. But for obvious reasons, I decided on front plate carrier accessible by both hands..